Step by-Step EPDM Leak Repair Procedure
Step 1: Phone Triage and Severity Assessment
- Confirm building address, roof access point, and current weather inside the structure.
- Identify whether water is actively entering occupied space or contained in the deck and insulation.
- Note membrane type: ballasted, mechanically fastened, or fully adhered EPDM.
- Estimate roof age. EPDM installed before 2005 often uses tape seams that have exceeded design life.
- Schedule the inspection and, if active intrusion is occurring, dispatch a tarping crew to dry in the area first.
- Ask the caller to photograph the interior stain pattern and any visible drips. This pre arrival documentation helps Britton Falls Metal Roofing estimators stage the correct materials before the truck rolls.
- Identify occupancy sensitivities: server rooms, retail inventory, medical equipment, or food service operations may require temporary containment plumbing before any roof work begins.
Step 2: Rooftop Inspection and Leak Origin Mapping
- Walk the perimeter first. Check termination bars, counter flashing, and coping cap fasteners for separation greater than 1/8 inch.
- Inspect every penetration: pipe boots, HVAC curbs, gas lines, conduit, and drains. Boots typically fail at 8 to 12 years.
- Probe field seams with a dull seam probe at 6-inch intervals. Any probe that catches indicates an open lap requiring repair.
- Look for membrane shrinkage at corners. Shrinkage of more than 3/4 inch from the parapet indicates systemic stress, not a localized repair.
- Document punctures, cuts, and abrasion points. Mark each defect with chalk and photograph with a measuring tape in frame.
- Use moisture meters on suspected wet insulation. Readings above 25 percent indicate saturated cover board that should be cut out.
- Inspect drains and scuppers for clamping ring corrosion, lifted target sheets, and debris dams. Drain assemblies are responsible for roughly one in four EPDM leak calls in Britton Falls.
- Check expansion joints and roof to wall transitions where dissimilar materials meet. Differential movement here often tears uncured flashing first.
For complex leaks where the visible defect does not match the interior stain pattern, we coordinate with our water damage team and reference techniques described in our guide to roof leak origin detection versus repair.
Step 3: Surface Preparation
- Sweep the repair area to remove ballast, debris, and loose granules. Clear a working zone 12 inches beyond the defect on all sides.
- Clean the membrane with EPDM-specific membrane cleaner. Do not substitute mineral spirits or acetone, which damage the rubber.
- Scrub with a white scrub pad until the wipe rag comes back clean. Discolored rags mean continued contamination.
- Allow the surface to flash off for 5 to 10 minutes depending on humidity. The surface must be dry to the touch.
- Mark the patch outline with a silver pencil. Patches must extend a minimum of 3 inches past the defect on all sides.
- Verify ambient temperature is above 40 degrees Fahrenheit for primer cure. Below that threshold, primer flash time doubles and bond strength drops measurably.
- Wear nitrile gloves during cleaning. Skin oils transferred to the prepared surface will create bond voids that show up as blisters within 30 days.
Step 4: Patch Material Selection and Application
- For punctures under 1 inch: use a 6 inch by 6 inch cured EPDM cover patch with primer and seam tape.
- For tears 1 to 6 inches: use uncured flashing membrane (45 mil or 60 mil to match field membrane) cut to extend 3 inches past each edge.
- For failed seams: clean the original lap, apply EPDM primer with a 4 inch roller, allow primer to dry until tacky (typically 5 minutes), then apply 3 inch seam tape and roll with a 2 inch silicone roller.
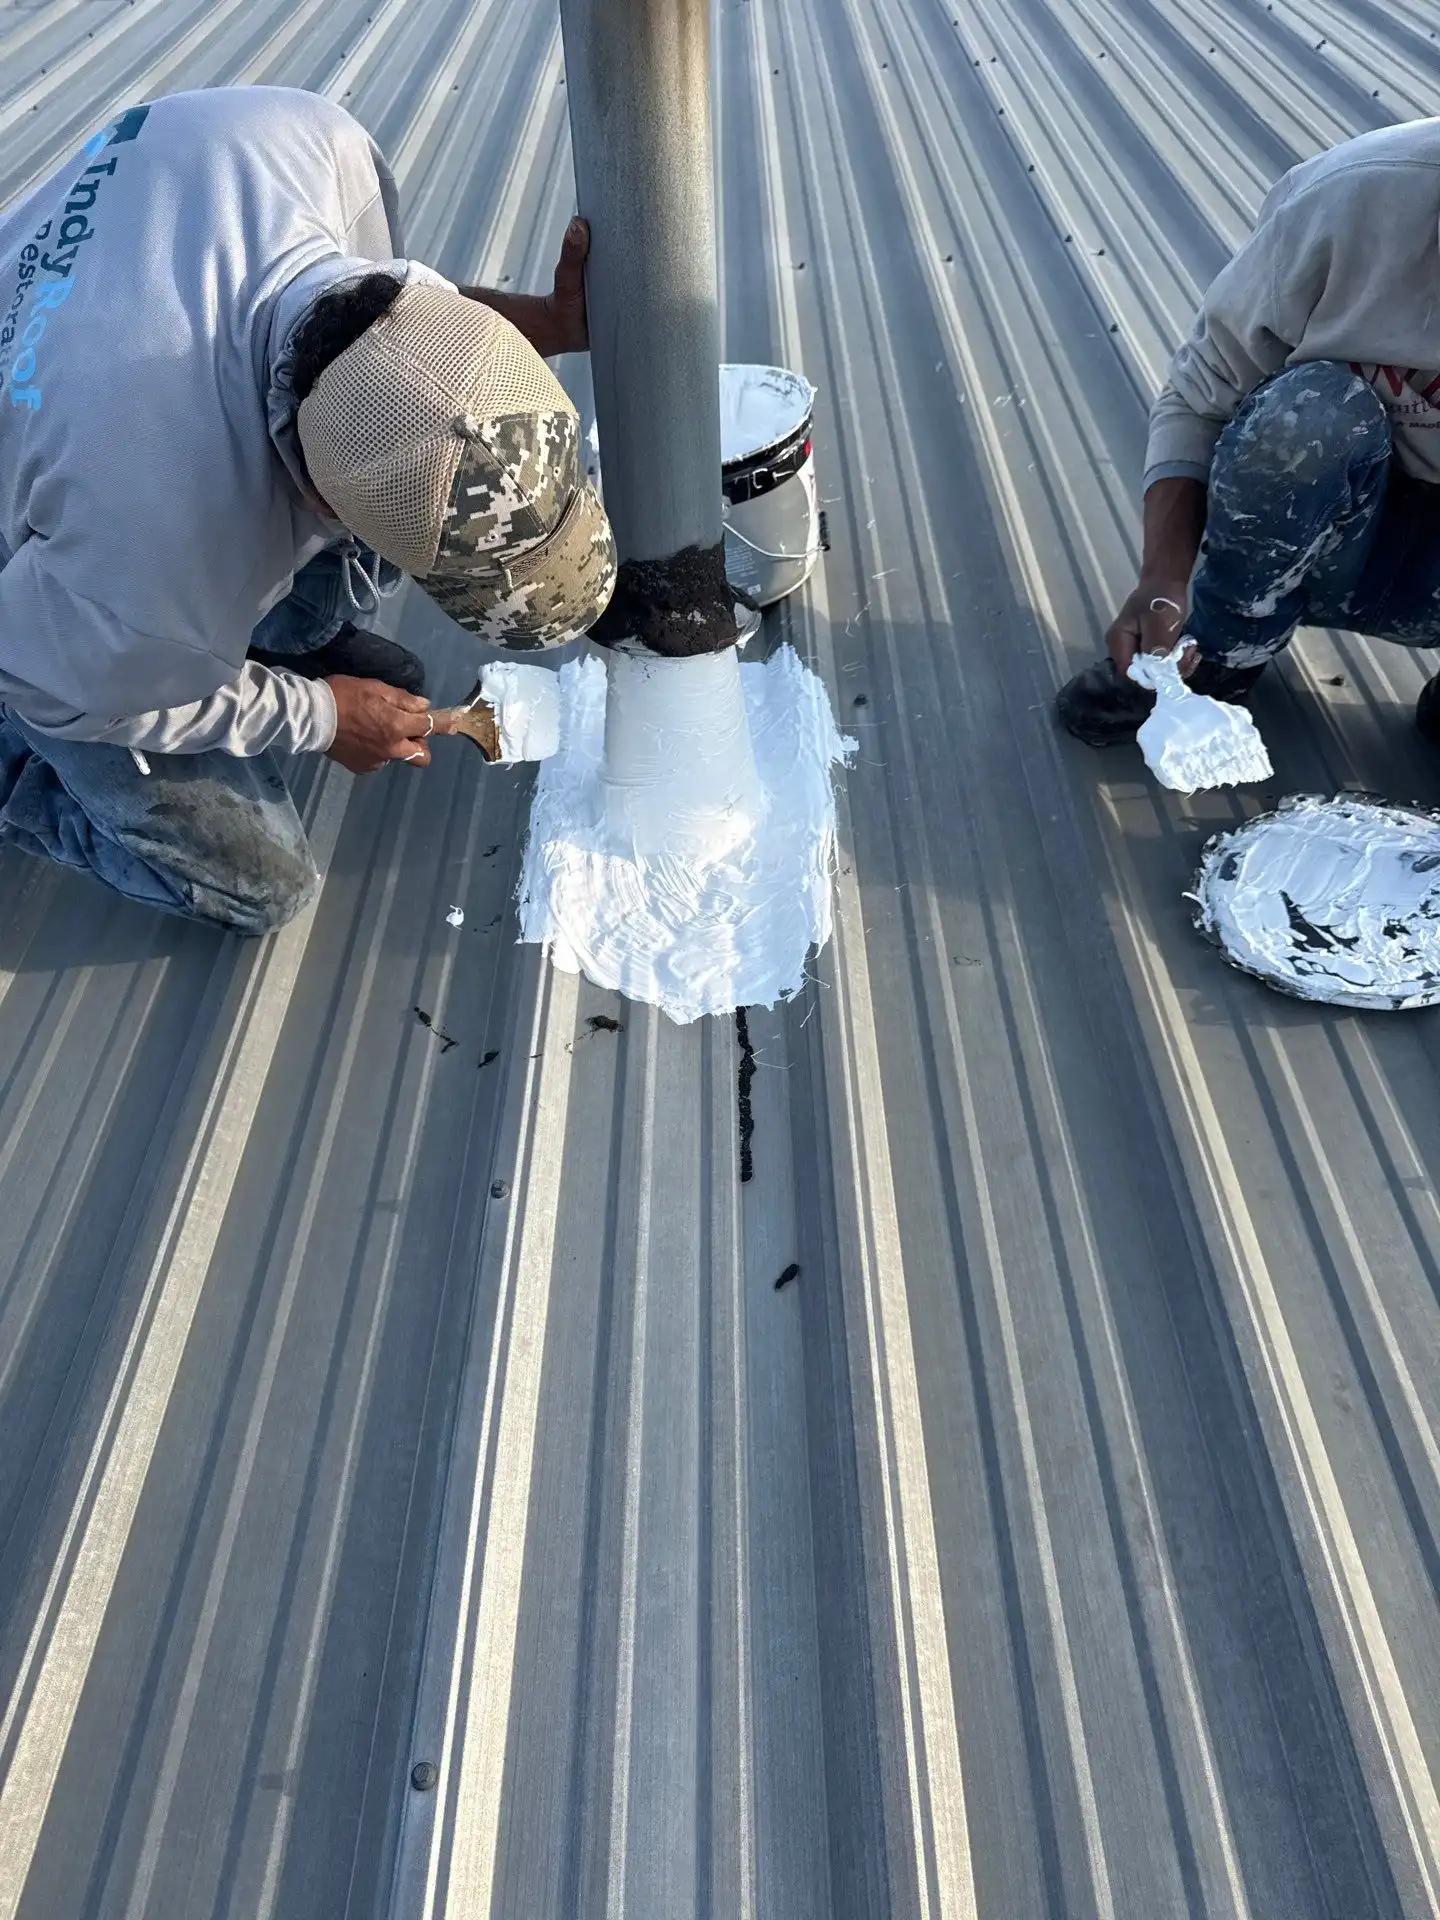
- For pipe boots: remove the failed boot, clean the pipe and surrounding membrane, install a new pre molded pipe flashing, secure with a stainless clamp, and seal the top with water block sealant.
- Apply lap sealant in a continuous 1/4 inch bead along all patch edges. Feather the bead with a clean putty knife so water sheds rather than ponds.
- Round all patch corners to a 1 inch radius. Square corners concentrate stress and peel first under thermal cycling.
- For inside corners at parapets, pre cut a target patch and install the field membrane first, then overlay the target. This sequence keeps water on top of laps rather than under them.
Typical EPDM Repair Costs in Britton Falls
Ranges reflect typical Central Indiana conditions, access, and 45-60 mil membrane.
Step 5: Interior Damage Assessment
- Inspect the deck from below where accessible. Look for staining radius, sagging tiles, and active drip points.
- Probe ceiling drywall with a pin meter. Readings above 17 percent moisture content require drying intervention.
- Check insulation batts in the cavity. Saturated fiberglass loses R-value and must be removed.
- Test electrical fixtures and conduit runs near the leak path with a non contact voltage tester before any drying equipment is staged.
- If interior damage extends beyond the immediate leak point, coordinate with restoration crews per our commercial roof repair protocols.
Step 6: Quality Control and Water Test
- Visually inspect every patch edge for full adhesion. No fishmouths, no lifted corners, no gaps in lap sealant.
- Roll the entire repair area a second time with a 2 inch silicone roller, applying 40 pounds of downward pressure.
- Conduct a controlled water test using a garden hose at low pressure for 15 minutes minimum. Begin downslope and work up.
- Re inspect the interior during and after the water test. Any moisture appearance means the leak source has not been fully addressed.
- Document the completed repair with photos and provide a written warranty appropriate to the scope.
Step 7: Determine Repair vs. Replacement Threshold
- If repairs exceed 15 percent of roof area within a 24 month period, replacement should be evaluated.
- If the membrane shows widespread alligatoring, brittleness, or shrinkage, patches will fail at adjacent areas within 6 to 18 months.
- If wet insulation exceeds 25 percent of the roof field, a full tear off is generally more cost effective than spot repairs, and we will outline options on our commercial roof replacement page.
- If the existing membrane is between 12 and 18 years old with intact field but failing accessories, a restoration coating system may extend service life 8 to 10 years at roughly 40 percent of replacement cost.
Step 8: Post-Repair Maintenance Schedule
- Schedule a semi annual inspection: one in spring after freeze thaw cycles, one in fall before snow load season.
- Clear drains and scuppers quarterly. Ponded water within 48 hours of rainfall accelerates membrane oxidation.
- Re seal lap sealant beads at the 5 year mark. EPDM lap sealant typically chalks and loses elasticity before the membrane itself fails.
- Maintain a roof log with dated photos of all penetrations, repairs, and equipment additions. Britton Falls Metal Roofing provides a digital roof file to every commercial client in Britton Falls as part of the warranty package.